How to make a job
This page is for developers
This page explains how to create new jobs for integration into the project. It is aimed to show to a developer some steps to successfully make a new job.
If you want sysadmin-oriented information, please consult the related page. For user-oriented information, please consult the other related page.
Overview
The plugin architecture of this project relies on the jobs folder(s), configurable through the --jobs option of the basic options (see the Server tuning section). These jobs folders are Python packages to be imported by the main application.
$ ./bots-scheduler run [...] --jobs my-jobs-folder --jobs my-other-jobs-folder
A folder can contain job class definitions in Python modules that will be dynamically loaded. The API for job class' definition is slightly enhanced regarding this of NdScheduler, for the sake of simplicity.
Job class template
On the contrary of NdScheduler, in this project, ndscheduler.job.JobBase can be subclassed as many times as needed without having each proxy class being captured as a usable job class. In other words, only leaf job classes in the inheritance tree are loaded.
The following snippet shows a job class template:
from botscheduler import *

class TestJob(JobBase):
    info = {
        'job_class_name':    "This will be displayed as the job class name",
        'notes':             "This will do something",
        'arguments':         [],
        'example_arguments': "",
        'report_title':      "An example report",
        'enabled':           True,
    }

    @report
    def run(self, *args, **kwargs):
        # do something
        # compute report_items here
        return item1, item2, ...
In this template, we notice:
- The wildcard import from
botscheduler, required for theJobBase, particular decorators and report object classes. - The job metadata in the
infodictionary, holding job's information for display in the WUI. - The
runmethod, decorated with thereportdecorator, returning a list of report objects.
For the job information, note that:
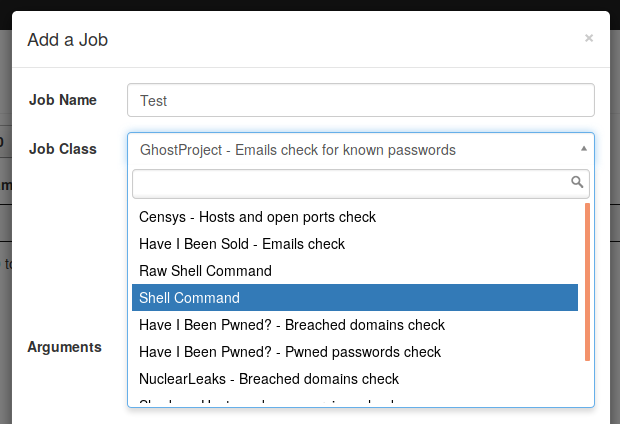
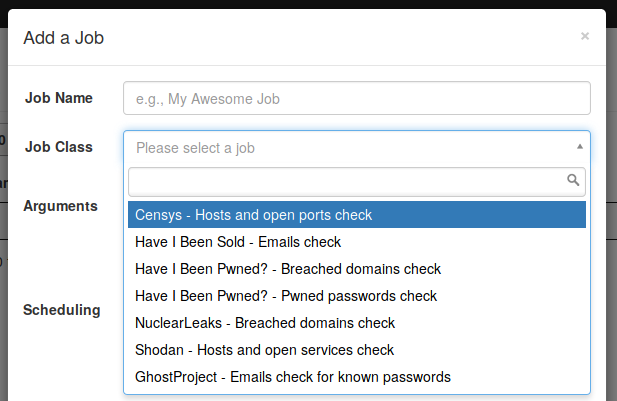
job_class_nameis displayed in the dropdown list when adding or modifying a job. Beware of name clashes as multiple classes can be defined at different locations, thus having a unique job class string (e.g.shell.ShellCommandandmyjob.ShellCommand) while being displayed as the same name in the WUI.argumentsis a list of dictionaries, one per argument, with thetypeanddescriptionfields. These are displayed in the WUI as help when adding or modifying a job.report_titleholds a static report title but can be omitted if the first return value of therunmethod is itself a title report object.enabledisTrueby default for any job class. It can thus be omitted for enabled jobs but must be included for disabling one (e.g.shell.RawShellCommand).
Jobs visibility
A job that has its enabled property set to False will not be visible at all in the WUI, that is, in the Jobs section but in the Executions and Logs sections as well.
 In this example, job executions and related audit logs will be viewable.
|
 In this example, job executions and related audit logs will NOT be viewable.
|
Report objects
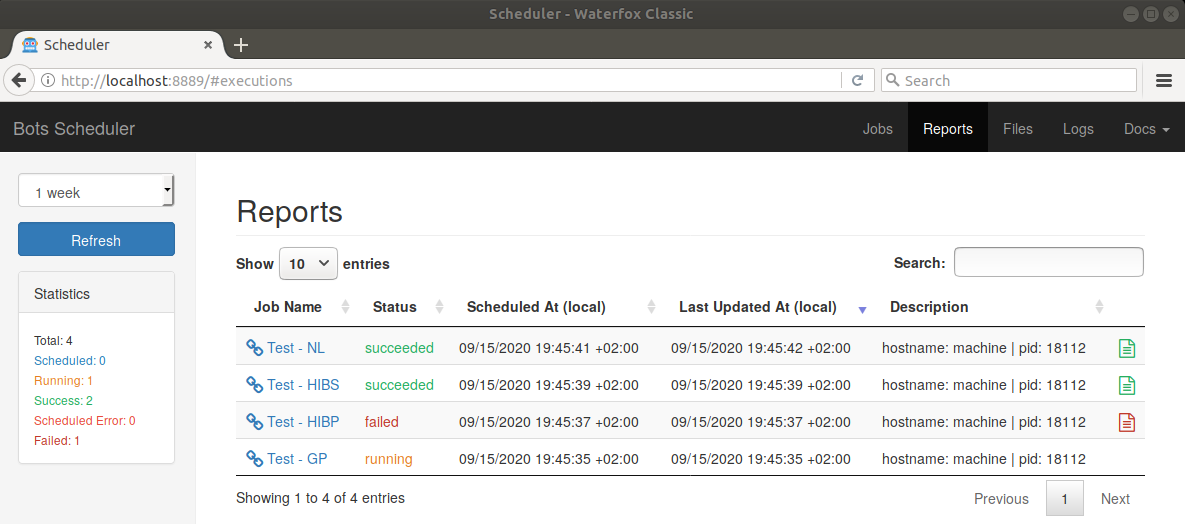
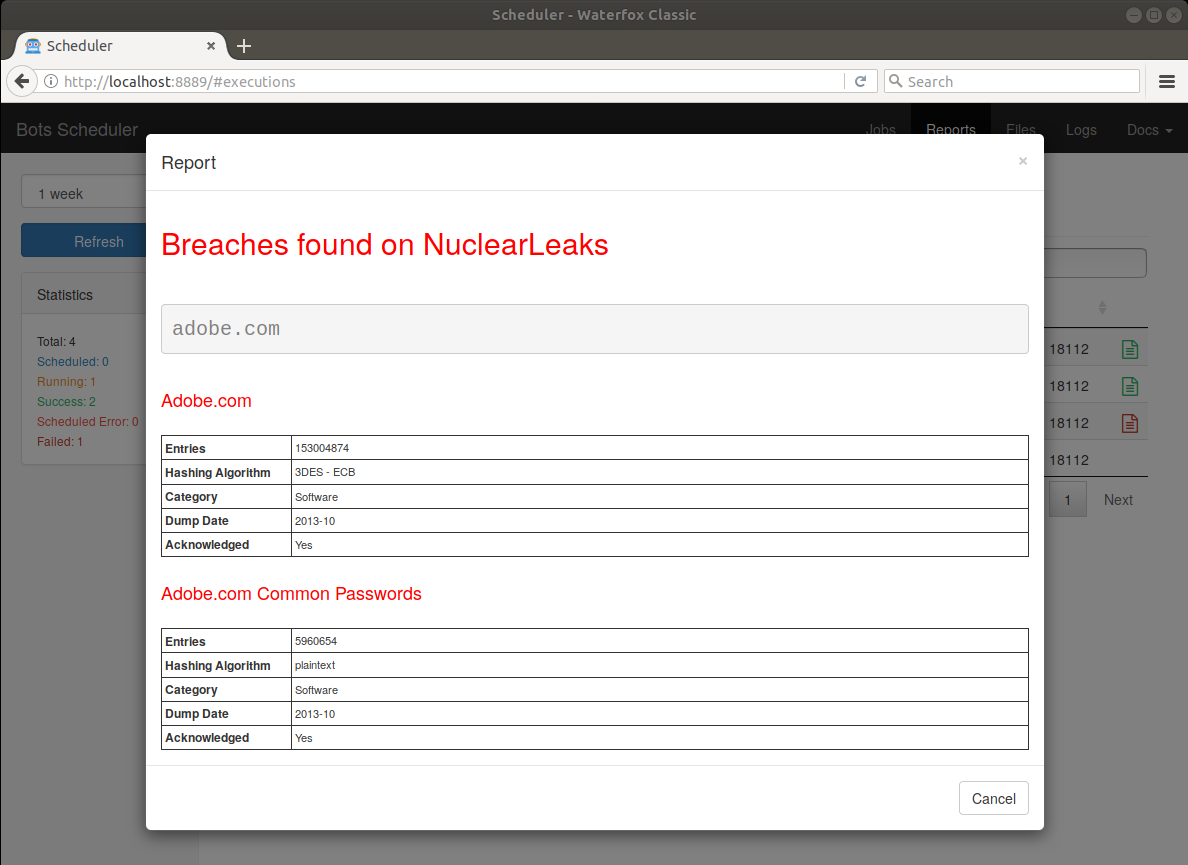
As mentioned before, report objects can be used to tune report's layout to be displayed for an execution in the WUI. The following screenshot shows where a report is generated and how it looks like.
|
|
A report is an assembly of objects from Tinyscript's report feature. For a complete list of report objects and more, please refer to this documentation. The most relevant report object classes in this project are:
| Class | HTML tag | Description |
|---|---|---|
Code(c) |
pre |
Code block, taking 1 argument: the [c]ode |
Data(d) |
Data [d]ictionary ; its HTML is generated using json2html | |
Image(s,d,w,h) |
img |
Image reference, taking up to 4 arguments: the [s]ource and optionally a [d]escription, the [w]idth and the [h]eight |
List(*i) |
ol, ul |
List of [i]tems that can be ordered or not |
Table(d,ch,rh,cf) |
table |
Table with column and row headers, taking 3 arguments : a list of rows as the [d]ata, a list of [c]olumn [h]eaders, a list of [r]ow [h]eaders and a list of [c]olumn [f]ooters |
Text(c,t) |
p |
Text paragraph, taking 1 argument : the [c]ontent to be displayed as a paragraph or any user-defined [t]ag |
Section(t) |
h2 |
Bold section title line, taking 1 argument : section title's [t]ext |
Subsection(t) |
h3 |
Bold section title line, taking 1 argument : subsection title's [t]ext |
By convention, the available jobs use the Section object class for their report title. For instance, in the case of haveibeenpwned.PwnedPasswordsJob, the return list of the run method holding the report objects simply consist of:
Section("Pwned passwords found on HaveIBeenPwned?")
List(*list_of_pwned_passwords)
Report object nesting
Report objects can be nested, e.g. Table([[img, Data(d)]]).
Another interesting example is this of ghostproject.GhostProjectJob:
Section("Email addresses with known passwords found on GhostProject")
Data(result)
The robot getting the pwned passwords per email address formats it as a dictionary, suitable for use with the Data report object, hence the simplicity in its definition as here before.
Robot classes
Defining a job class is one issue, writing robot classes in PyBots is another. Of course, the run method can always contain machinery to perform complex network communication tasks, but PyBots is aimed at standardizing the way robots are made and used through context managers. If you would like to get a new robot implemented for use in a Bots Scheduler job, please submit an enhancement issue or implement it yourself, preferably sending a pull request for incrementing the library.
The way robots from PyBots can be used is particularly convenient for sparing lines of code in job class definitions. For instance, nuclearleaks.NuclearLeaksJob's run method starts with:
@report
def run(self, emails_domains_path, **kwargs):
    with NuclearLeaksBot() as bot:
        results = bot.breaches_from_file(emails_domains_path)
    [...]
The whole work is done by the NuclearLeaksBot that exposes a very simple interface for getting its result.
Another example is shodan.ShodanHostsCheckJob that calls ShodanBot, itself relying on ShodanAPI that implements the full API as of this documentation.